
Networking for Robots: A crash course
by David Kohanbash on March 3, 2014
Hi all
There are many people who are familiar with setting up a home network, but now lets look at how to setup a network on your robot. There are two parts to setting up a network; the hardware and the software. This post will go into both of those topics.
Before I begin to talk about networking, we must first define what a network is (for the purpose of this post). A network is a group of devices that can all talk to each other and have addresses that are within range of each other. This second part of this is what gets many people confused. Every device has both an IP address and a subnet mask. The IP address is the address of the device (in the form xxx.xxx.xxx.xxx where each xxx is from 1-255), and the subnet mask lets us know which part of the IP is for identifying the external network and which part is for the internal network. For our purposes the portion of the IP address in the internal network is what forms our network. There are ways of constructing subnet masks to be very specific, however there are three masks that are most commonly used and will work for just about all (if not all) robots. The masks are: 255.0.0.0 (also called class A), 255.255.0.0 (also called class B), and 255.255.255.0 (also called class C).

No matter which mask is chosen there are four segments that correspond to the four segments in the IP address (We are talking about IP version 4, there is also a version 6 but it is not used much yet). If you have two IP addresses the way that you know they can talk to each other is if the portions of the mask that are 255 have the same numbers in both addresses. When multiple devices can talk within their network it is referred to as being a local area network or LAN. People will also use the term wide area network or WAN to refer to devices that are external to your network.
For example:
| First IP | Second IP | Subnet Mask | Result |
|---|---|---|---|
| 192.168.1.2 | 192.168.1.3 | 255.255.255.0 | These can communicate since the change in the IP’s are by a 0 in the mask. |
| 192.168.1.2 | 192.168.9.3 | 255.255.255.0 | These can NOT communicate since in the third section the first has a 1 and the second has a 9, while the mask has a 255. |
| 192.168.1.2 | 192.168.9.3 | 255.255.0.0 | These can communicate since the mask has a 0 in both of the last sections. |
This is a very quick introduction to subnet masks and IP addresses. There is a lot more that I left out. I will discuss some more below and not mention most of the other things that are less important for general robotics.
If you are in a remote location and need to get on the internet check out this post for various ways to get online from the middle of nowhere.
Networking Hardware
Router (firewall, gateway, etc..)
The router is the gatekeeper of your network, and controls what data can enter your network and how it should be routed.
In addition to controlling what traffic can enter your network, it also can give out addresses to each device in your network. This ability is called Dynamic Host Configuration Protocol (DHCP)
If your robot never connects to the outside world or to a different network (as defined above)then you do not need a router. There are many robots out there that do not need a router. If you do not have a router then you can assign a static IP to each device or run a DHCP server from an onboard computer.
In many situations a router will be used to connect a wired and wireless network together. Routers also have filtering capability so you can firewall off and protect your internal network.

There are typically two types of ports on a router. There is a WAN port (white port in the image above) and a LAN port (multiple yellow ports in the image above). There are often multiple LAN ports if the router has a built-in switch. The WAN port must be connected to the external network and the LAN port(s) must be connected to the internal network.
Modem
A modem (technically) is a device that converts digital information to analog information and visa-versa. Rightly or wrongly wireless modems are usually called wireless routers. The one case of a modem (that we call a modem) being on a robot is cellular modems for remote access.
Switch / Hub

A switch forms the backbone of a network by connecting all the devices together. This is usually where ethernet cables plug in. There are several types of switches that you can get. There are managed switches that allow you to configure the switch with basic routing information and segment the switch ports into multiple networks, and there are unmanaged switched like what most of us are familiar with. When you purchase a switch you need to pay attention to the speed that it is rated for. The most common options are 10/100 (also called fast ethernet) or 10/100/1000 (also called gigabit ethernet) bits-per-second. You can use a slower grade switch but it will become the bottleneck and slow down your otherwise fast network.
Pro Tip 1: Remember if you exceed about 75% of the rated network speed, your overall speed actually decreases due to collisions on the network!
Pro Tip 2: Remember that packets have headers, footers, etc.. that adds to your total data transmission size.
It is also usually better to get a switch then a hub. Switches can direct traffic only to the port where that device is connected. Network hubs broadcast the traffic to all ports. The primary case where a hub is better is when you are trying to debug the network. It is easier to sit on a hub and sniff/spy on the data then it is when you are using a switch that directs the traffic.
Wireless AP & Repeaters
Wireless access points connect to your network and allow you to add a wireless portion to your network. If you need to extend your range there are many things you can do as discussed in this post. The other option is to add a wireless repeater. Many business/commercial grade wireless AP’s let you operate them in repeater mode to extend the reach of your network, including this one.
Ethernet Cables
This last item which is often ignored is the cable that is used to connect all of the devices on your network. There are two ways that ethernet cables can be wired, “straight through” or as a “cross over”, in a cross over cable some of the wires are swapped to enable two devices to talk directly to each other without going through a switch/router. If you are using a switch/router then you want to use a straight through cable. Many devices can auto-detect which cable is attached and adjust accordingly, however many embedded type systems can not. Also some routers/switches will have an “uplink” port which is essentially just an internal cross over cable, saving you the trouble of buying/making a cross over cable.
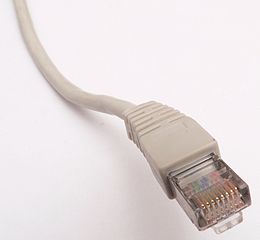
When you operate in a (electrically) noisy environment (such as a robot) you should use shielded ethernet cables instead of the standard unshielded ethernet cables that you probably have at home. The shielded cables often look similar to the unshielded ones, but are a bit thicker and have metal on the RJ-45 connectors at the end of the cable. When you call manufacturers for help with components (such as motor controllers) they will always ask about the ethernet cables, and blame faults on the use of unshielded cables. You can be proactive and use shielded cables to avoid that response from vendors (especially since that is usually not the cause of your problems).
There are two categories of cable that are commonly used. The first is cat5e and the second is cat6. If you want true gigabit speeds (or faster) you need to use cat6 cable. Cat6 looks almost identical (usually slightly thicker) to Cat 5e but is manufactured with more noise immunity. With that said, if you do not buy cat6 cable from a reputable vendor it probably does not meet the cat6 specification, you wasted your money, and will not be able to achieve the desired speeds. Here is an interesting article about not getting what you paid for.
Ethernet cables do go bad and you should suspect them if something is not working right. One quick way of diagnosing a bad cable (besides trying another one) is to look at the lights next to where the cable plugs in. A green light means the cable is connected, and a flashing orange means that there is data being passed on the cable.
The maximum length for standard cat5e or cat6 cable is 100m (328ft). If you need to go farther than 100m you need to put an active device, such as a switch, between cable runs to help boost the signal. There are several factors that can increase or decrease that range. The two primary factors are noise and wire type. If you are in a high noise environment (near motors) then the maximum length can decrease while using shielded cable can help increase the length. Using solid wire in the ethernet cable can get you a longer range since there is less attenuation in a solid wire then in a stranded wire.
Power Over Ethernet (POE)
Many of the above devices can be purchased with a POE option. POE is a technology where power is put on the unused wires of the ethernet cable to transfer power to the device so you do not need to put a separate power cable near the device.

POE Injector. Note the POE and LAN ports. Don’t mix them up!
In order to use POE you need to inject the power onto the wires. This is often done with a device called a “POE Injector”. The POE Injector will have two types of ethernet ports (usually). LAN and POE, the LAN port does not have power on it and can be connected to other devices/switched without destroying them. The POE port will have the power injected onto the lines and goes to the POE device. You can also get a switch that has POE on each port. Make sure you do not mix up the ports with power and the ones with no power!
Network Configuration
IP Addresses & DHCP + NAT
As we mentioned before there are different types of IP addresses. The ones external to your network and the ones that are part of your network. When an IP is directly reachable from another public network (usually connects to the routers WAN port) such as the internet, that IP is referred to as being a public IP. When you have a router, you can usually configure two separate IP addresses, one for the WAN port and another for the LAN port. The DHCP settings that you can configure are based on the network that the LAN port IP is configured with.
(As a side mention your router uses Network Address Translation (NAT) to use one public IP on the WAN port on the router, and let all the LAN devices connect over that)
There are several ranges of IP addresses that we can assign to our local devices, however they are not routable. Being not routable means that a router will refuse any outside connections directly to that device (great for security). The two most common of those ranges are 10.0.0.0 – 10.255.255.255 with a class A subnet mask, and 192.168.0.0 – 192.168.255.255 with a class C subnet mask.
The way that most routers work is by using DHCP. With DHCP the devices can ask the router (or DHCP server) for an IP address and it will respond with an address for that device to use. When the router assigns the address, the IP is said to be “dynamic”. The problem with dynamic addresses are that they are dynamic, and they can change every time the device turns on, so if you try communicating with a device you do not know what its IP is. To solve that we can use static addresses. There are two ways to assign a static IP address and I recommend using both of them. The first way is to add a reservation in the DHCP server that says every time it sees a specific device to always give the same IP. The second way is to configure the static IP into the device manually so that it does not ask the DHCP server for an address.
If you want to connect to your robot over the internet you need to obtain a static IP address from your internet service provider (ISP). You can then either assign that static IP to your robot or more often than not you will assign it to the WAN port on your router and use the port forwarding that I will discuss in the next section.
(When you get a static public IP from your ISP they will often give you two IP addresses. For example 23.23.23.23 and 23.23.23.24. The first one is the static IP of your router, and the second one is the static IP that you can assign to the device connected to the router. This means that you really have 2 static IP’s. Using the first one and port forwarding you can direct where that traffic should go and then you can put the second one on another device. I often just use the first one with port forwarding so I can take advantage of the firewall abilities of the router and direct traffic to multiple devices.)
Port Forwarding (or Virtual Servers) & Demilitarized Zone (DMZ)
When data/traffic comes to your ethernet port (or router) it not only goes to your IP but also to a port. A port is just a numeric designator that can be used for directing traffic. For example when you go to a standard webpage it talks to your computer/router over port 80. Another common port is for the File Transfer Protocol (FTP) which is port 21. There are thousands of port numbers used by thousands of devices.
So how do you tell your router to send incoming traffic to a specific device? You can create a DMZ that tells the router that it should treat a specific device/computer as the incoming target for everything. However that is not a secure place to put your device on the network. Also you can only have one device in the DMZ (on most routers), what happens if you want to send traffic to multiple devices?
The solution to this is to direct your router to send incoming traffic to different devices based on the port. The Port Forwarding settings page which is sometimes called virtual servers is usually in the firewall section of the routers configuration page. The common items that need to be configured for port forwarding are:
Name – Any random name that you choose. But try to keep it meaningful.
TCP/UDP – Which protocol is it using TCP, UDP, or Both. If you are not sure you can select Both.
Public Start Port – The incoming port. If this is for a port range, this is the start port number.
Public End Port – The incoming port range end number. If you are using a single port you often put the start port in this field as well.
Private Start Port – Some routers let you get data from a public port and send it to a different port on the internal network.
Private End Port – End port if you are using a range.
Host IP – This is the internal IP of the device/computer that the traffic should go to.
Gateway Address (or Default Route)
This is the address that you assign on your device/computer for how it should connect to other networks. This is usually the IP address of the LAN port of your router. There are cases where you have a wireless router/AP that is used internally and for DHCP, and a separate router that connects to the internet. In that case the one that connects to the internet should be the gateway address.
If you do not need to get out of your network then you can leave the gateway address empty.
Domain Name System (DNS)
DNS is the system that lets names such as robotsforroboticists.com map to an IP address, since computers really use IP addresses for the networking.
Within your local network if you are just talking amongst devices using the IP addresses you do not need a DNS server and you do not need to specify a DNS server addresses. If you want to talk to computers that are on the internet you might want to configure a DNS server address in your network settings. A good default DNS server to use is from google at 8.8.8.8.
Linux Networking Stuff
I was going to avoid talking about how to configure networking on your device/computer, however I feel there are a few Linux things that I should point out. Just like Windows has moved most networking functions to fancy graphical interfaces, Linux is also trying to do that. But for now the commands work and are good to use.
command: ifconfig – This lets you check the IP of a port and set a new IP.
command: iwconfig – lets you configure wireless settings and view wireless networks in range
command: route – This lets you view and set the routes (including the default route)
file: /etc/resolve.cong – A file where you specify the DNS servers
file: /etc/<different based on version>/interfaces – a file to specify IP addresses, masks, etc..
command: sudo /etc/init.d/networking <start|stop|restart> – to start, stop, or restart the networking
command : sudo ifup – start a device
command : sudo ifdown – stop a device
I hope this helps. Networking can be an adventure, but if you understand the above you will be well off for configuring your robots network.
Click here to learn all about wireless antennas and signal propagation.

Comments
[…] out my Networking for Robotics tutorial for more details about some of the networking magic […]